Tag Archives: recipes

The Best Red Lentil Soup of 2012

It’s no secret around here that I like to cook big when I can.  A big pot of beans, a big pot of soup, a big pot of chili.  Doubling a recipe saves time and isn’t much more work than making a single recipe.  Usually when I double up, I’m feeding a crowd or making one meal for tonight’s dinner and another to freeze for another time.  But then there are occasions when I make a huge pot of something and just eat it twice a day for a week.  This soup is one of those somethings.  It’s that good.

You might think that March 2 is a little early to be declaring anything the “Best of 2012.”  But I’m pretty sure.  I’ve had a go-to red lentil soup recipe for years (it was The Best Red Lentil Soup of 2008 or thereabouts, and has held the title since).  This soup has replaced it with a vengeance.

I knew it would be good, because it was recommended to me by the same friend who gave me that amazing chilaquiles recipe.  She is a great cook and discerning recipe collector, and when she tells me to try something I always do.  This recipe is slightly adapted from 101 Cookbooks, which is another good sign, because I always like Heidi Swanson’s flavorful and sometimes quirky cooking.  In this case her stroke of genius is to add raisins to the soup, which plump up into barely-there bursting bits of sweetness mingled with the curry and coconut flavors.  In case you are feeling cautious to begin with, I will give you the regular-size recipe and you can use your discretion as to doubling it.  (You definitely will next time.)

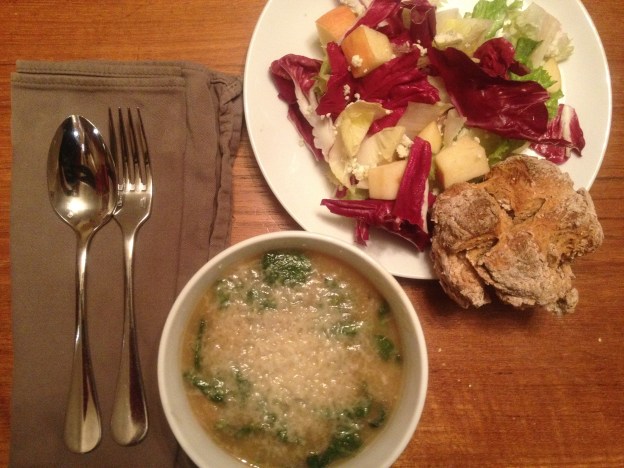
The Best Red Lentil Soup of 2012: Bring 1 c. red lentils and 1 c. yellow split peas (both picked over and well-rinsed) to a boil in 7 c. water.  Reduce heat to a simmer, add a chopped carrot and 2 tsp. finely minced ginger (I like to grate it with my Microplane), and simmer until split peas are entirely soft, 30-45 minutes.  Meanwhile, heat a gob of coconut oil in a separate pan and saute a bunch of chopped green onions (reserve a handful for garnish) with 2 more Tbsp. minced ginger and 1/3 c. golden raisins.  After two minutes, add 2 Tbsp. Indian curry powder and saute for another minute, stirring constantly, then add 1/3 c. tomato paste and stir for one minute more.  When the lentils and peas are soft, add the tomato-spice mixture to the soup with a can of coconut milk and 2 tsp. salt.  Simmer uncovered for a bit to blend the flavors and thicken the soup; you can adjust the consistency with more water or more cooking.  Serve over cooked brown rice, garnished with those reserved chopped green onions, chopped cilantro, and a dollop of Greek yogurtIf you try this and know of a better red lentil soup recipe, please let me know in the comments.  I never get tired of lentil soup.

How to Cook Black Beans

Writing about cooking lately has made me reflect on the fact that we think that cooking is harder than it really is.  Take making a pot of beans.  Simple, really.  Beans, water, salt.  That pot will feed you for a long time.  Cooked beans freeze well.  Dried beans cost a fraction of what you pay for canned beans.  Canned foods, including beans, can contain unsafe levels of BPA as well as excessive sodium and preservatives.  And still–still!–it wasn’t until a few years ago that I started using dried beans almost exclusively.  It seemed like too much trouble to cook my own.

So it is with the zeal of a convert that I implore you to set aside a few hours some weekend to cook a pot of beans.  I’m not saying the canned kind are wrong, and I always keep a few cans in my pantry just in case, but there are so many good reasons to cook dried beans yourself.

Once you decide to make the leap, it’s hard to go wrong.  You can soak your beans, or not.  You can salt them as they cook, or wait until the end.  You can use this season’s beans from a crunchy co-op that has amazing dried bean turnover, or cook up the bag that’s been hiding in the back of the cupboard for years.  Despite the vast number of opinions on each of these topics, in my experience you can tune all that out and your beans will turn out just fine.

Ready?  Good.  First, keep an eye on your beans as you take them from the bag or jar to make sure that there are no little rocks mixed in.  Second, measure them out so you have an idea of how much salt to add later.  Finally, give them a good rinse before putting them into your pot.

I like to soak my beans only because it speeds the cooking time on the stove (and thus the actual supervision required).  You can soak your beans covered by a few inches of water overnight, or you can “quick soak” them: put them in a pot, bring it to a full boil for one minute, then turn off the heat and leave your covered pot alone for an hour.  At this point you can drain the beans, or not.  (Some claim that draining the water after an initial soak helps make the beans more digestible.  Others say you’re just pouring valuable nutrients down the drain.  No worries.  Your beans will be great either way.)

So now your black beans (soaked or unsoaked) are in your pot.  Cover the beans with a few inches of water.  (This can be the soaking water if you soaked the beans, or new water.)  Bring the pot to a boil for a few minutes, skimming off any foam that gathers, then reduce the heat to a simmer.  At this point you can leave the beans completely plain, or add any additional flavorings you’d like: some chopped onion, chopped jalapenos, dried epazote, dried oregano, crushed garlic cloves, chopped cilantro stems, whatever.  I usually make my beans rather plain, then add more flavorings later.  Leave the simmering pot partially or fully covered.  Cook for at least half an hour if you soaked the beans, or an hour if you didn’t, then taste a bean.  Once they begin to soften, add about 3/4 tsp. salt per cup of dried beans that you started with.  Continue cooking until beans are completely soft.  This may take two hours or more if you are using unsoaked beans.  (The cooking time will vary according to the beans’ freshness; even soaked beans can take nearly two hours if they are quite old.)  If the water seems to be getting low, add more boiling water.  If there is too much water when the beans are done, pour some off.  Taste the beans as you go.  If they don’t taste great to you, they probably need more salt.  Add a small amount at a time and simmer for a few minutes to let it soak in before tasting again.

Looking for ideas to use up your delicious pot of black beans?  Mix with rice, top with salsa and it’s dinnertime.  Or click the “Mexican Flavors” link on the sidebar for emmycooks recipes (like maybe these chilaquiles?) that await your black beans with open arms.Some Recipes to Show Off your Black Beans:

Black Beans with Cilantro and Lime
Chilaquiles
Vegetarian Taco Salad
Quinoa Chili with Red Peppers
Enchilada Bake with Black Beans and Tofu
Huevos Rancheros
Winter Wheat Berry Chili
Southwestern Frittata with Peppers, Black Beans, and Cheddar
Black Bean Tacos

My Favorite Recipes: February 2012

It was difficult to choose my favorite recipes from this month! My top five recipes below were all new to me this month, so they are ones that I am newly excited about. But I also cooked several of my old standbys, so make sure you scroll back through this month’s posts to find your own new favorites.Favorite Recipes Collage Feb 2012

Celebrate Spring with A Canning Jar Coddled Egg
Smoky Cauliflower Frittata (or, even simpler: Roasted Cauliflower)
Shaved Brussels Sprout Salad with Lemon, Pecorino and Red Onion
Pasta with Garlic, Anchovies, Chili and Breadcrumbs
Quick Whole Wheat Spice Bread with Brown Sugar, Orange Zest and Walnuts
And last but not least, a readers’ favorite: Eat Your Greens: Easy Handmade Spinach Pasta

Thank you for reading and cooking along with me!  And welcome to the many new readers who have joined us this month.  To receive daily recipe updates, you can subscribe to this blog via RSS or email, or follow @emmycooks on Twitter (links on the sidebar).  And special thanks to The Kitchen’s Garden Project and Cook Every Day for your recognition of emmycooks this month.

And finally, hey, maybe a recipe index would be helpful around here.  If you have created one and have any tips for me, will you please leave me a note in the comments?  Thank you!

Oatmeal Cracker with Black Pepper, Parmesan, and Rosemary

Savory Oatmeal Cookies with Rosemary, Black Pepper, and Parmesan

Continuing the cheese-and-cracker-in-one theme of this week’s happy hour menus, I baked a batch of savory oatmeal “cookies” with rosemary, black pepper, and Parmesan cheese.  It sounded a little zany when I first read the recipe on The Kitchn, but I was on a tear with the homemade crackers and jumped right in.  (A much later search on the internet turned up all manner of variations on the theme of cookies and crackers combining oats, Parmesan and savory herbs–who knew?)Oatmeal Cracker with Black Pepper, Parmesan, and Rosemary

These are not really cookies and not really crackers.  They’re a little sweet and a lot savory.  Cookers?  Crackies?  No matter.  They wouldn’t be out of place in a cocktail party spread or on a cheese board, but they’d also make a great ending to a meal by themselves alongside a glass of port.  Or, you know, just leave a jar of them on the counter.  They’ll be gone before you know it.

Savory Oatmeal Cookies with Rosemary, Black Pepper, and Parmesan: Sprinkle 1/4 c. hot water over 1 c. rolled oats in a large mixing bowl.  In a smaller bowl, whisk one egg with 1/3 c. olive oil and 1/4 c. light brown sugar.  Pour this mixture over the oats and stir to combine.  In a third bowl (I know, sorry!), mix 1 c. flour with 1/4 tsp. baking soda, 2 tsp. chopped rosemary, 1/2 tsp. salt, and 1/2 tsp. freshly cracked black pepper, then stir in 1 c. freshly grated Parmesan cheese.  Gradually stir the flour mixture into the oat mixture until well combined.  Roll into 1″ balls, flatten each to 1/4″ thick, and place on a parchment-lined cookie sheet.  They can be close together because they don’t grow much.  Sprinkle a pinch of salt (flaky sea salt if you have it) on top of each cookie.  Bake at 350 for 15-18 minutes, until the edges are crisp and golden brown, then move to a rack to cool.

Pictured on the left: Savory Oatmeal Cookies.  On the right: Parmesan and Black Pepper Crackers.  Just add Rye Crackers with Apricot Chevre Spread, a bowl of salty nuts, and the house cocktail.

Earl Grey Chocolate Cake

Shutterbean recently posted this Real Simple recipe for an Earl Grey Chocolate Cake.  And I was torn.  Chocolate and Earl Grey?  Yes.  Dreamy combination.  But Real Simple?  Not for me.  I sometimes want to buy it off a magazine rack, sure, because who wouldn’t want to “Organize Your Whole Life in 15 Minutes” or learn “25 Fast Healthy Breakfast Ideas You’ve Never Thought Of Before”?  But those are false promises, or at most two-page spreads, and when I have actually purchased the magazine I have come away with the feeling that it was really just trying to sell me cleaning products all along.  And I don’t really like to clean.

Luckily, I didn’t let my issues outweigh my love of cake.  Because this is a good one.  I love a chocolatey chocolate cake, which this is not.  (For a moist, delicious, super chocolatey cake, bake these Vegan Chocolate Cupcakes as a cake instead.)  This Earl Grey Chocolate Cake has a lighter chocolate flavor, which is a good thing (weird! I know!), because it allows the tea to come through.  The Earl Grey flavor is subtle, but definitely noticeable.  Intriguing.

The bundt pan that I dug out of the back of my cupboard gave the cake an irresistable chewy-crisp edge.  If you’re a middle-of-the-brownie-pan kind of person instead, don’t worry, all but a few millimeters of the cake is fine-crumbed and moist.  (But oh!  Those few millimeters!  If you are an edge-of-the-brownie-pan kind of person, you will love that edge.)  The bundt pan also made J refer to me (fondly, I think) as a Midwestern housewife.  If you live in the Midwest, do you make a lot of bundt cakes?  I think that is a lifestyle I could definitely embrace.Real Simple Earl Grey Chocolate Cake

I enjoyed making Earl Grey Chocolate Cake in part because you mix everything in one bowl, so it required relatively little cleanup (see above re whether I like to clean).  Boil a cup of water and infuse it for 3-5 minutes with 6 Earl Grey tea bags or 2 Tbsp. loose Earl Grey tea, then set the tea aside.  Spray a bundt or tube pan and set it aside.  Melt and cool 4 oz. semisweet chocolate.*  In your mixing bowl, cream 1/2 c. softened butter with 1 3/4 c. sugar, then mix in 3 eggs. Mix in the melted chocolate.  Continue to mix while adding 2 c. all-purpose flour, 1 tsp. baking soda, 1 tsp. baking powder, 1/4 tsp. salt, 1/2 c. plain yogurt and that strong cup of Earl Grey tea.  Scoop the cake batter into your pan.  Bake 45-50 minutes at 350 or until a skewer comes out with a few crumbs (rather than raw cake batter) attached.  Let the cake cool for 5 minutes, then turn out of the pan.  Cool, then dust with confectioners’ sugar before serving.

*The original recipe called for 4 oz. unsweetened chocolate and 2 c. sugar, but I didn’t have unsweetened chocolate.  Make it easy, use what you have on hand.

Baked Fish with Coconut Curry Rub

Sometimes you need a recipe.  Like that bread we all made yesterday, that recipe was good.  Sometimes cooking requires precision.  But often it just requires inspiration.

I have had some comments recently about my recipe-writing style on this blog.  I often call for a pinch, a dab, a scoop, a handful.  Meaning: use the amount that seems right to you, you know your tastebuds best.  So far, all the comments I’ve received about this approach have been positive.  It seems that many of you, like me, enjoy reading recipes because they spark a good idea about technique, or flavor combinations, or because they remind you to use up that cauliflower that’s languishing in the back of the fridge.

It is in that spirit that I bring you the “recipe” below.  It’s just an idea, and not even my own original idea (how many recipes are really original?).  I saw this idea somewhere recently, I can’t remember where, and it stuck with me and came to mind when I needed it.  And it was absolutely delicious.  To me, that’s a good recipe.

Scoop some coconut oil and Thai curry paste into a bowl.  (I used yellow curry paste, but red or green would also be great.)  Warm briefly in the microwave to melt the coconut oil–and because, wow, doesn’t that smell GREAT?  Spoon thickly over fish and bake at 450 until the fish flakes when you cut into it.  Cooking time will depend on the thickness of the fish.

Quick Whole Wheat Spice Bread with Brown Sugar, Orange Zest and Walnuts

This afternoon, as my five year old drifted off to napland, she  opened her eyes to dreamily ask, “Mommy, after my nap, can I have TWO MORE PIECES of that bread you made, with butter?”  I smiled and nodded, and she was fast asleep.  Inspiring that kind of delight is the best reward a cook can hope for, in my book.

It’s lucky that this recipe makes two loaves of bread, because my family started  hovering around the cooling rack the moment the bread came out of the oven.  The source of this recipe, Cheryl Sternman Rule (writer of this lovely blog), calls it “Toasting Bread.”  She advises you to cool the bread completely before slicing,  toasting, and spreading it with honey butter.  I am here to tell you that the “letting it cool” part will be very difficult.  We could not withstand the siren scent and ate most of the first loaf warm, slathered in salted butter.  It was heavenly.  Lest it appear that I am contradicting Ms. Rule, however, I should add that the loaf we could bear to let cool was indeed delicious toasted.Quick Whole Wheat Spice Bread with Brown Sugar, Orange Zest and Walnuts: Grease two loaf pans well with softened butter.  Whisk an a egg in large bowl, then whisk in 3 Tbs. honey, 1 c. dark brown sugar and 1 1/2 c. milk.  Zest two oranges directly into the bowl.  Trade your whisk for a wooden spoon or spatula and stir in the dry ingredients: 2 c. whole wheat flour, 2 c. all-purpose flour, 3/4 tsp. ground cloves, 1/2 tsp. salt, and 4 tsp. baking powder.  Mix well, then add 1 c. chopped walnuts and mix again.  Divide batter between your two prepared pans.  Bake at 350 for 45-50 minutes, until a toothpick tester comes out clean.  Remove from pans and cool on a rack.  Hover over the bread, inhaling deeply, resisting as long as you like, then serve toasted (or still warm) with butter.


Roasted Potato Salad with Arugula and Blue Cheese, with or without Smoked Trout

While I have nothing but admiration for those of you who grill outdoors in the snow all winter long, that’s just not me.  First of all, it rarely snows in Seattle.  Second, grilling in a drizzle just isn’t as dramatic or satisfying as braving the snow to cook outdoors.  (I mean, I imagine that it’s not.  I’ve never actually grilled in the snow.  See above.)  Anyway, it’s not summer now, which is grilling season in my book, which is how I ended up making a winter version of one of my favorite summer salads using roasted instead of grilled potatoes.

I planned to serve this salad alongside a couple of pan-fried trout, but in the end the trout stayed safely on ice and we opened a can of smoked trout to flake into the salad to make it meal by itself.  The contrasts here are quite nice: the peppery greens, creamy blue cheese, crisp hot potatoes, and the added salt and smoke from the trout if you go that route.  Roasted Potato Salad with Arugula and Blue Cheese, with or without Smoked Trout: Slice potatoes 1/2″ thick (I used halved fingerlings), toss with olive oil and salt, and roast at 450 until crisp, turning occasionally.  Meanwhile, make a vinaigrette by mixing 1 Tbsp. sherry vinegar with 3 Tbsp. olive oil, a dab of dijon mustard, and salt and pepper.  Shake well.  When potatoes are done, lightly dress a bowl of arugula and toss well.  Add roasted potatoes and blue cheese and toss again.  Divide into bowls and top with flaked smoked trout, if using.  Dinner is served.

Savory Shortbread: Parmesan and Black Pepper Crackers

My grandfather is visiting me in Seattle this week along with my parents.  He is 98 and just the way I hope to be if I am ever that age.  Fit, happy, and he always has something nice to say about everyone and everything.  And he is something of a gourmand.

We are four generations under one roof when everyone is home, and I try to be mindfully grateful for this time together.  But while one half of my brain is enjoying the sight of my grandfather laughing at my baby’s hysterical giggles, the other half is thinking ahead to happy hour.

Happy hour was a religious observance in my grandparents’ home.  Five o’clock?  Drinks magically appeared, ice cubes tinkled in glasses, salty snacks graced the coffee table, everyone stopped what they were doing and came together.  Time has not diminished my grandfather’s appreciation of this ritual, and why should it?  It’s never a bad idea to wind down your day with a tasty beverage and the people you love.

These crackers, really a savory shortbread, are perfect cocktail hour fare.  I’ve also made my grandpa those rye crackers, of course.  This recipe is Ina Garten’s.  You need to allow at least 30 minutes to chill the log of dough, or you can make the dough ahead of time, freeze it for a month or two and then just let it defrost slightly before slicing and baking.Parmesan and Black Pepper Crackers: Start by softening a stick of butter in your mixer.  Add 3/4 c. grated Parmesan, 1 1/4 c. flour, 1 tsp. fresh thyme leaves, 1/4 tsp. kosher salt, and 1/2 tsp. freshly ground black pepper.  Mix again.  If the dough is too dry (if it doesn’t form crumbs when pinched together), mix in a few spoonfuls of water or milk.  Turn the dough out onto a piece of plastic wrap, shape into a 13″ log, wrap well and freeze for 30 minutes.  Slice about 1/4″ thick and bake on an ungreased cookie sheet at 350 for 20-25 minutes, until the crackers begin to turn golden brown.  Cool completely on a wire rack.  Serve at happy hour.

White Bean and Spinach Soup

I’d say that in the past few months, I’ve been quite successful in my quest to stop feeding my family scrambled eggs for dinner all the time.  But I’m still not much of a planner.  Which means that the dinner hour is often neigh by the time I roll into the kitchen, wondering how our evening meal is going to materialize.

At times like these, it helps to have a well-stocked pantry.  And freezer.  This is one of those recipes that you can spend all afternoon making–or it can take 30 minutes if you keep the right ingredients in stock.  In this case, the right ingredients are an onion, a leafy green vegetable, a good vegetable broth, and some well-seasoned home-cooked white beans.  (Of course you can substitute canned beans, but you must first brown an onion, then toss in a handful of chopped garlic and sage for a few minutes, then add the beans and cover with water or vegetable broth and simmer to let the flavors blend.)

Do you cook your own beansMake your own broth?  I do, because I find the homemade versions of these things so much better and SO much cheaper than anything I can buy.  This might seem inconsistent with my professed inability to plan ahead, but I just do it every once in a while when I will be home on a Sunday afternoon: put a huge pot of beans on the stove or make eight quarts of stock.  It helps that I have a large freezer to store these things in.  What do you people do in Manhattan?  Anyway, I will start sharing recipes for some of the pantry basics that make it easier for me to get a good meal on the table quickly.  Another day.Today, White Bean and Spinach Soup: Grab a quart of good vegetable broth and a few cups of well-seasoned white beans from your freezer.  Warm the beans in a soup pot with a cup or so of broth while you saute an onion over high heat in a separate pan.  Once the onion is nearly golden and nearly caramelized, use a slotted spoon to scoop about half your beans into a blender and puree them with the onion and another cup of broth.  Add the puree to your soup pot and stir in a big bunch of chopped spinach (chard, kale, or other greens would also be great).  Simmer until the greens are tender, then thin the soup to your desired consistency with additional broth and season to taste with salt and pepper.  Serve under a shower of Parmesan shavings or a drizzle of olive oil, with crusty rolls on the side.  (The one pictured is a mini whole wheat soda bread, recipe to come after a little more experimentation.)  And what’s that gorgeous salad, you ask?  Radicchio? Endive? Apples? Blue cheese?  Oh, yes.  Hop on over to the lovely blog Salt On the Table for the full recipe.